In this guide
In my case, a poured concrete foundation was out of the question. It was too expensive to haul that much concrete to my home, and it wasn’t a job I could tackle myself anyway. Be sure to give a poured foundation proper consideration — it might make sense for you even though it didn’t for me.
Block as the form
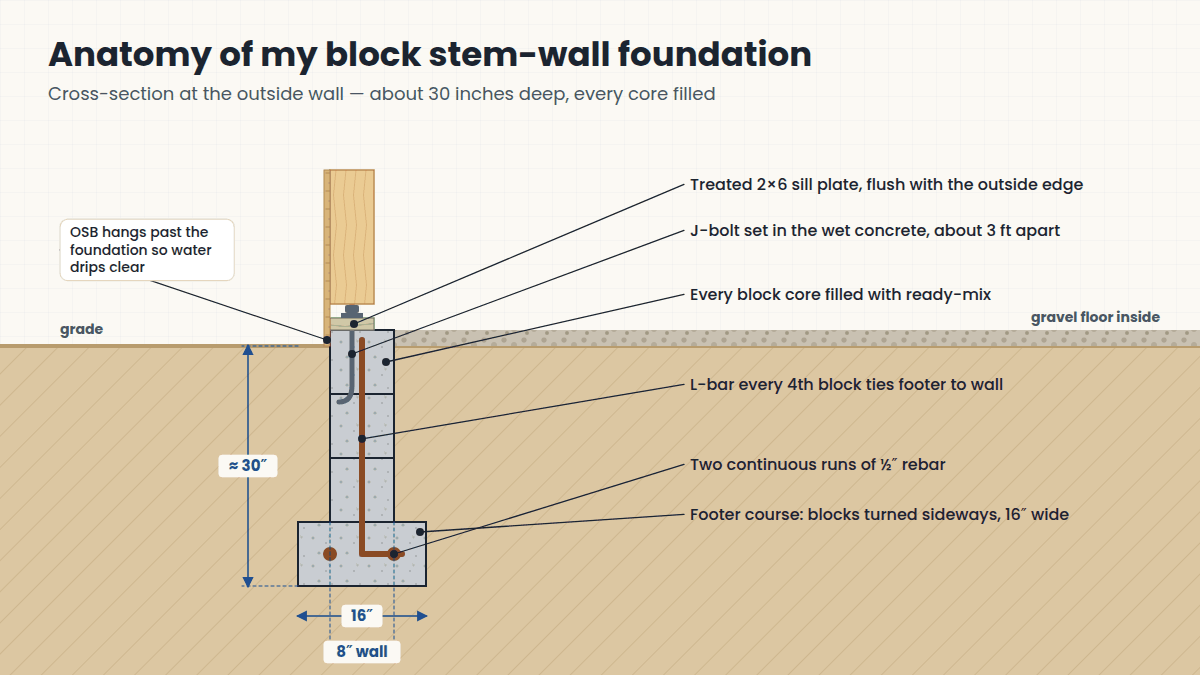
The design I went with used concrete block basically as the form, then filled all of the cores with concrete. The blocks give you straight, square walls without building wooden forms, and the concrete inside — with rebar — does the structural work.
Bags vs. a concrete truck
The original plan was to buy bags of concrete and fill the cores by hand. I later found two problems with that:
- It’s far too much concrete to move by hand. (The inspector estimated about 5 yards — hundreds of bags.)
- It would create cold joints, because it would be impossible to fill the entire foundation at once. Concrete poured against concrete that has already started to set doesn’t bond into one piece.
A better solution was to have a concrete truck come up and fill all the cores. One load was plenty, so the cost wasn’t too bad.
Rebar
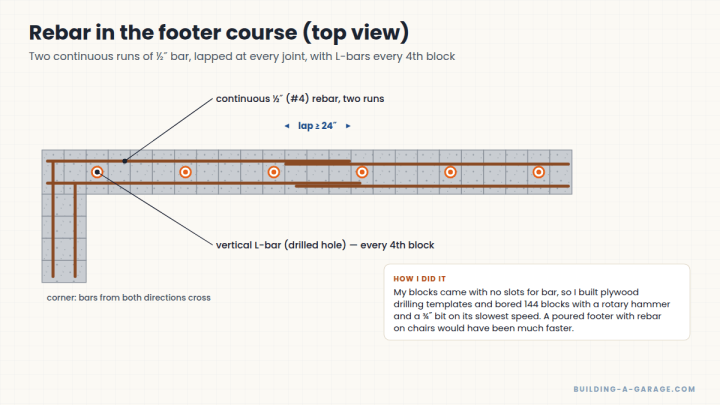
The concrete also needed rebar for strength. Some blocks had to have holes drilled in them to hold the bar. I’ll cover exactly how in Setting the Footer Block and Rebar.
Digging the trench
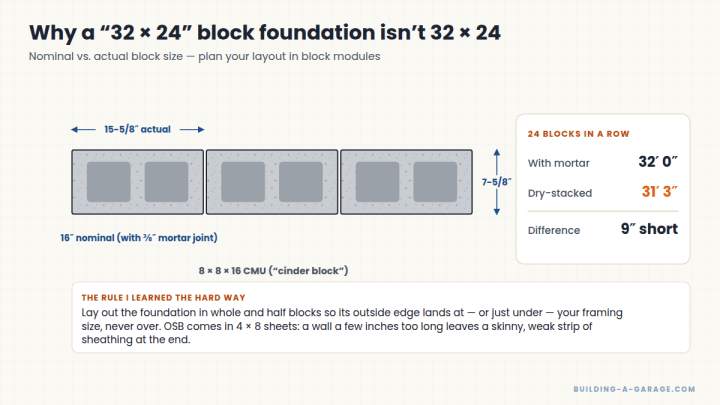
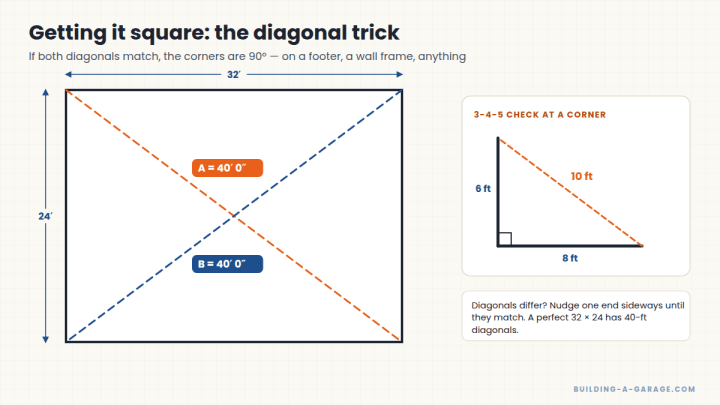
Before I could do any of that, I needed a 32×24-foot trench to set the blocks in. That process took about two months, thanks to the huge amount of rock in my yard.
I needed something that could dig large amounts of soil and rock quickly. I went to a heavy equipment auction in a nearby city and found a good deal on a mini excavator (also called a track hoe). It runs on tracks and has a backhoe for digging and a push blade for filling and smoothing. It wasn’t in great condition, but it served my needs perfectly well — and at the end of construction I sold it for nearly what I paid. I wish all my choices had worked out that well.
Rent, buy used, or hire?
For a few days of digging, rent. For a long, rocky, on-and-off project like mine, buying a used machine and reselling it can cost less than months of rental. If time matters more than money, hire an excavator — but read the rock clause.
The foundation sequence I followed
- Bring in fill and level the building pad.
- Rope off and dig the trench.
- Lay and level the footer course, then drill and set the rebar.
- Dry-stack the stem-wall blocks.
- Get the rebar looked at by the inspector.
- Fill every core with concrete from a truck and set the anchor bolts.
- Cure, backfill and get the foundation inspection signed.
Key Takeaways
- Block can act as the form for a fully grouted foundation.
- Avoid cold joints: fill the whole foundation in one continuous pour.
- A used mini excavator paid for itself on my rocky site.
Leave a Reply