In this guide
Several details must be settled before we begin framing walls. Understanding them first reduces the chance of problems while we work.
How are the corners joined?
This matters because it dictates how you begin and end each wall. For garages, the most common standard is the 3-stud corner (some people call it a 4-stud corner).
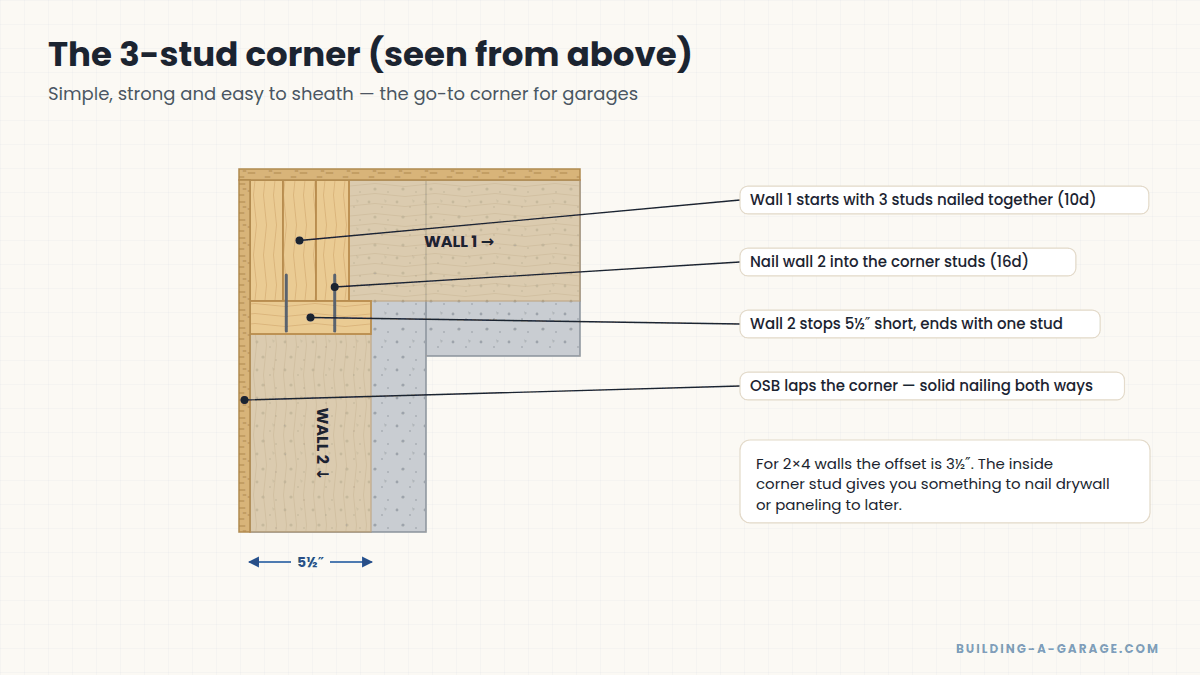
Begin your first wall with three studs nailed together. End that wall short of the foundation corner — 3½ inches short for 2×4s, 5½ inches short for 2×6s — with a single stud, not three. When you start the next wall, build it with the same 3-stud setup at its beginning. When you stand up the second wall, nail it to the single stud at the end of the previous wall.
There are more complicated corner methods, usually reserved for homes where maximum insulation matters. For garages, this corner is easy and very strong.
What is the nailing schedule?
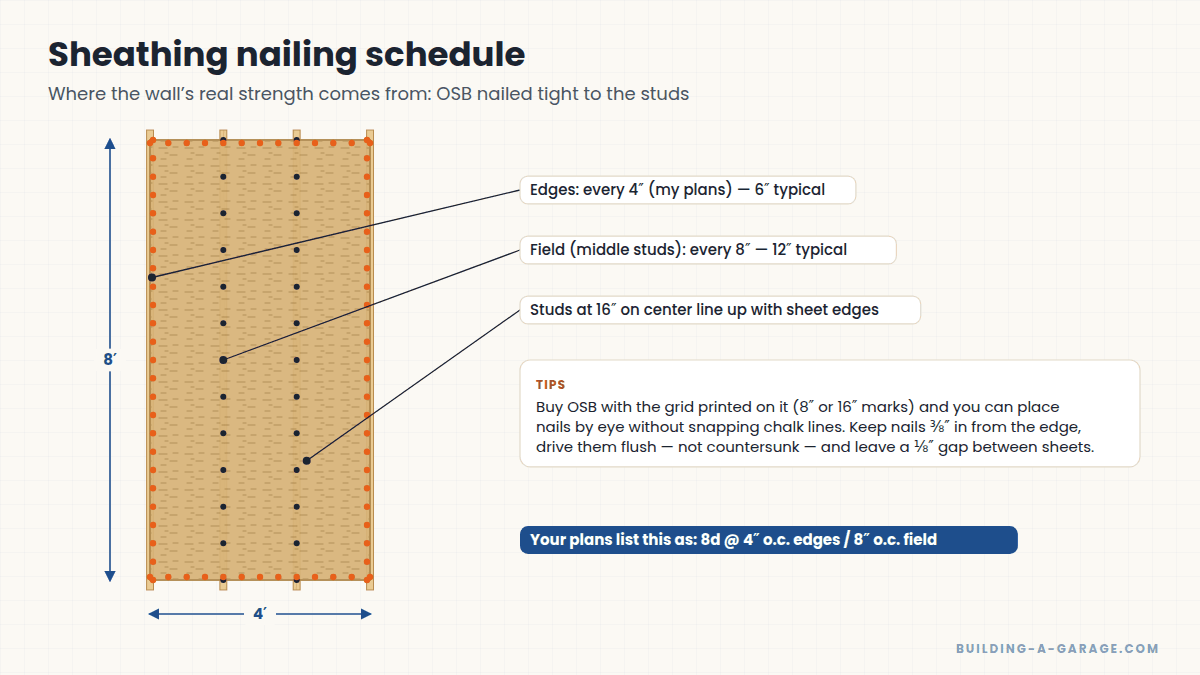
In other words, how far apart are the nails, and what type? Your blueprints should state the nailing schedule. If they don’t, assume your area’s standard — commonly 6 inches on the panel edges and 12 inches in the field.
My blueprints called for more:
- 4 inches on center at the edges of each OSB sheet
- 8 inches on center in the field (the middle studs)
That’s twice the norm, but typical for my high-wind area.
What kind of lumber?
I needed different lumber depending on where it went.
- Treated 2×6 for the sill plate. Treated lumber is required wherever wood contacts concrete. Both top and sill plates should be the longest boards you can find, carry or have delivered, so there are as few joints as possible.
- Standard 2×6 for everything else, including the top plates, using 92⅝-inch precut studs — the cheapest and most common length.
- OSB sheathing in 4×8 sheets. It isn’t treated, so protect it from water; siding and trim will do that eventually, but cover it when storing it outside. The nailing schedule on your prints will probably specify the thickness (usually ½ inch for walls, which will be labeled 15/32).
How far apart are the studs?
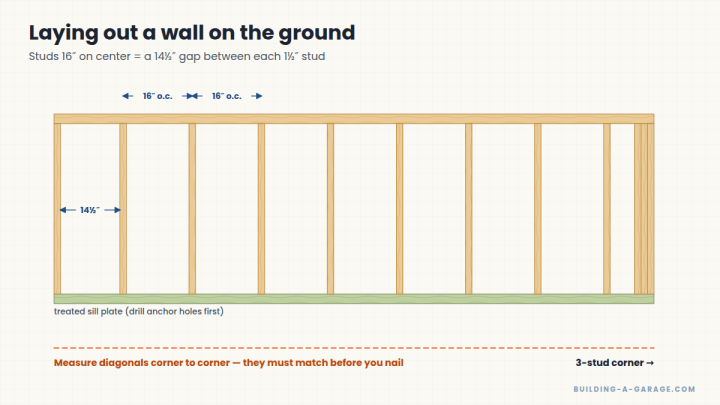
Your blueprints will specify this — typically 16 inches on center, meaning the centerlines of the studs are 16 inches apart. If your prints say something else, follow them. Most importantly, don’t use a random spacing, or your studs won’t line up with the edges of the 4×8 sheathing. Sixteen inches is the standard because it divides evenly into 48 and 96 inches.
What kind of nails?
I needed a few types of nails to do the best job possible, plus a framing nail gun. Nails for framing nailers come in large boxes, which can be a problem if you only need a few of one type, so you might make some trade-offs. For example, any nail going into treated lumber should be galvanized, especially if it could get wet. I spent a little more and used galvanized nails nearly everywhere, so I didn’t need special nails for the sill plate.
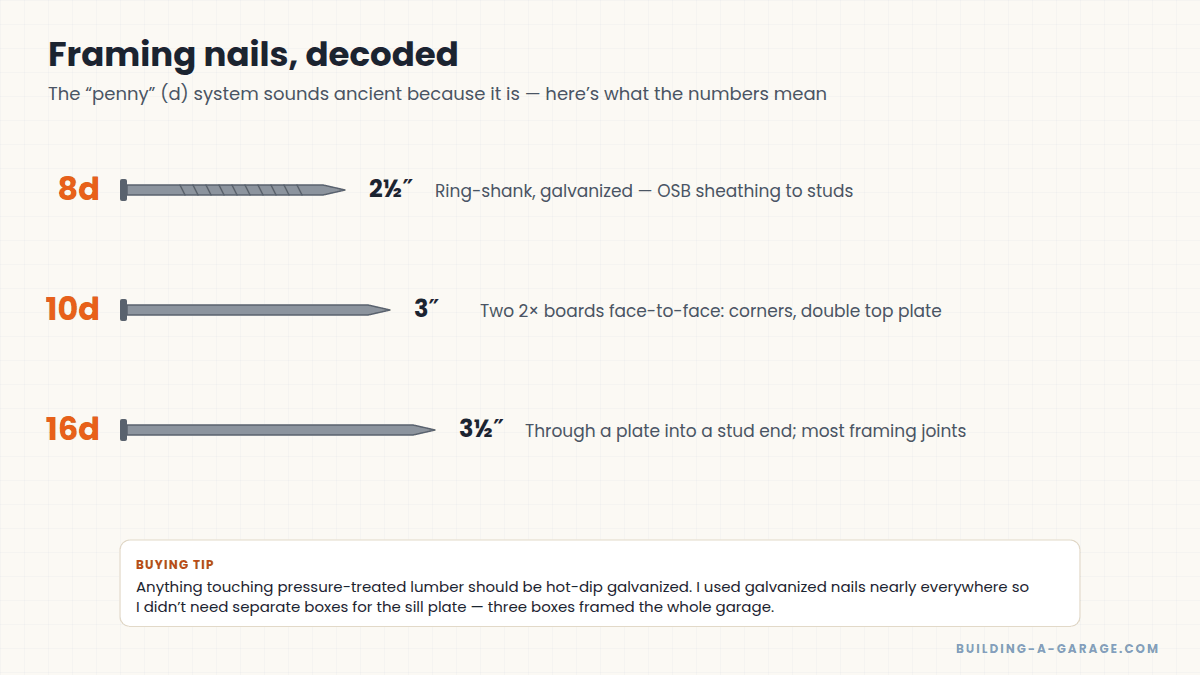
- 8d galvanized ring-shank (2½ inches) — to fasten the OSB to the studs. The OSB-to-stud connection is where most of the wall’s strength comes from, which is why my engineer specified the nail and pattern. Ring-shank nails resist pulling out and galvanizing resists rust. They’re nearly impossible to remove, so try not to mess up!
- 16d galvanized (3½ inches) — for nearly all the other framing, like fastening studs to the sill and top plates.
- 10d (3 inches) — ideal for joining two 2×4s or 2×6s face to face: the three corner studs, the double top plates, and any doubled studs, such as at joints in the sill plate.
Three boxes of nails were enough to get the job done.
Nail gun safety
Framing nailers are the leading cause of serious injuries on small construction projects. Use a sequential (single-shot) trigger while you’re learning, keep your free hand well away from the nose, wear safety glasses, and never carry the gun with your finger on the trigger.
Confused?
If these issues are new to you — they all were to me — look for the section of your blueprints that covers them. Often all of this information is in the nailing schedule. In the wall-framing area of my blueprints, I found:
- ½″ OSB
- 8d nails
- 4″ o.c. edges
- 8″ o.c. field
- 2×6 construction @ 16″ o.c.
- Tyvek
As you can see, that one small area of my prints answered nearly every question above.
Key Takeaways
- Use a 3-stud corner and end each wall one wall-thickness short of the corner.
- Follow the nailing schedule on your plans exactly — it’s the wall’s strength.
- Studs at 16 inches on center line up with 4×8 sheathing.
- 8d for sheathing, 10d for face-nailing, 16d for most framing.
Leave a Reply