In this guide
Now it’s time to raise the wall into place! Either get a few people together, or use heavy machinery like I did.
Lifting it into place
I ran straps from the top plate to the bucket of my mini excavator and raised the walls that way. Set the wall onto the foundation and line up the anchor bolts. Hopefully everything lines up! If so, use the washers and nuts to tighten the sill plate to the foundation.
Next, measure the diagonals again and fix any flex that happened during nailing and lifting. I just used the backhoe to gently push on the side of the wall that needed adjustment.
Temporary reinforcement
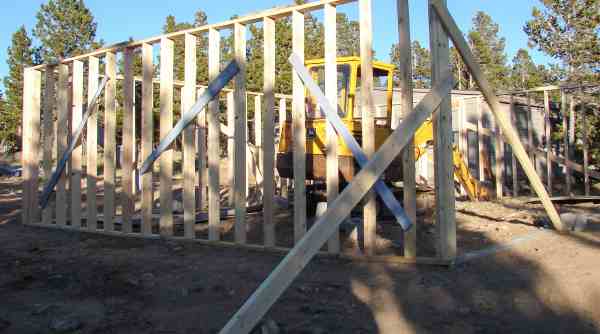
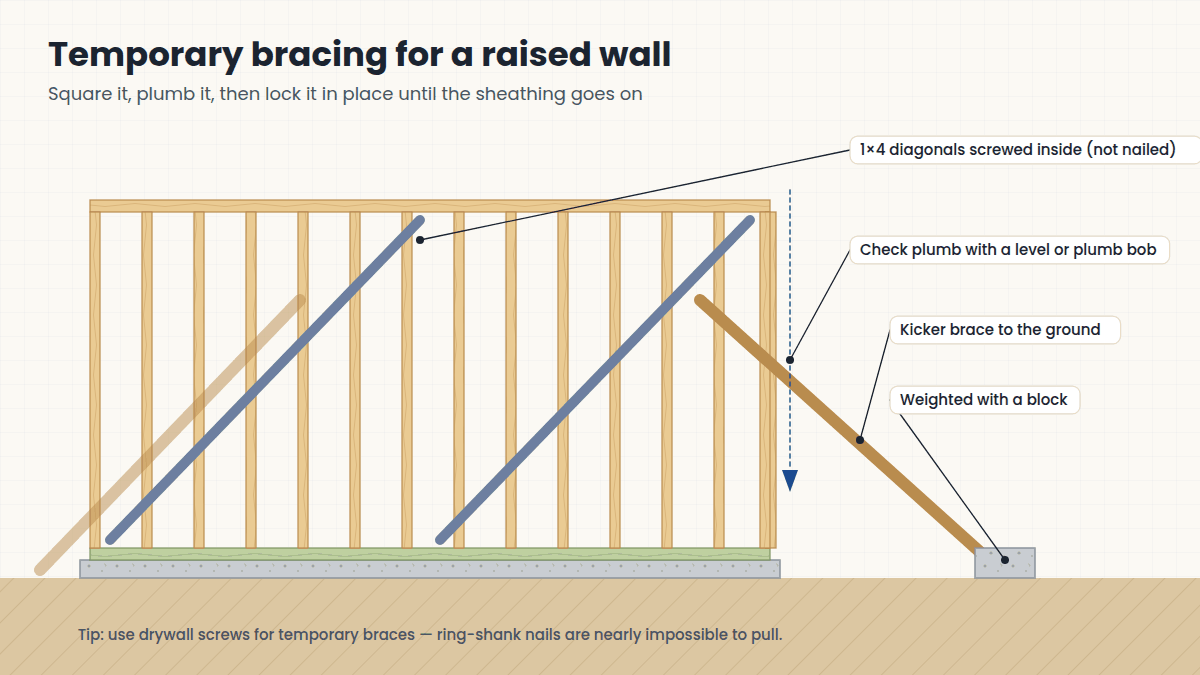
The walls aren’t very strong yet, because they’re missing the second top plate and the OSB sheathing. So I screwed scrap 1×4 lumber diagonally to the inside of the walls. Don’t use your super-strong ring-shank nails for this — you’ll never get them back out! I used a screw gun and cheap drywall screws. This bracing keeps the wall square so you don’t have to keep measuring and adjusting the diagonals.
Keeping it plumb
The walls are also prone to tipping, especially if the wind gets hold of them (or an errant backhoe bucket). Use a plumb bob or a long level to make sure the wall is plumb, then add diagonal braces to the ground to keep it perfectly vertical. I nailed long scrap boards at several places along the wall and at the ends, running diagonally to the ground, and set concrete blocks on the boards at ground level to keep them from moving.
Brace for the wind
A standing wall without sheathing can be pushed over by a gust. Brace both sides if strong wind is possible, and don’t leave unbraced walls overnight.
Key Takeaways
- Lift with enough people — or a machine and straps.
- Tighten anchor nuts, then re-check diagonals.
- Screw temporary diagonals inside; brace to the ground outside.
Frequently asked questions
How many people does it take to raise a garage wall?
For a long 2×6 wall, plan on at least three or four people, more if it’s windy or sheathed. Lifting with straps from a machine, as I did, works too — go slowly and keep everyone clear.
When can I remove temporary wall bracing?
Leave it until the walls are sheathed, the second top plate is on and the roof framing is installed and braced. Remove the inside diagonals as the sheathing goes on; the outside kickers usually come off last.
Why use screws instead of nails for temporary braces?
Screws come out cleanly without damaging the framing or making you pry out ring-shank nails. Cheap drywall screws are fine for temporary work.
Leave a Reply