In this guide
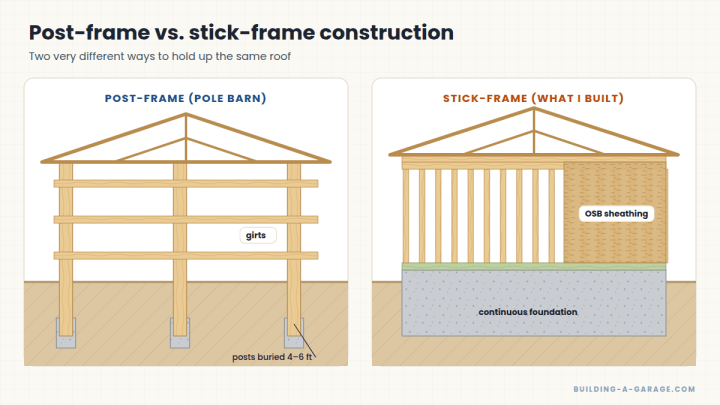
I made an initial phone call to my county’s building department to learn what was required to build my own garage. I was fearing the worst, because the red tape some departments impose can be overwhelming. They told me that if I used post-and-beam construction I’d definitely need engineer-stamped blueprints. However, there was another option that didn’t require blueprints or an engineer at all.
Standard (pre-approved) garage plans
My state published a set of garage construction plans that I could download, fill in with some information, and submit to the county for a permit. I found those plans extremely helpful for understanding what I was doing, so look for a similar document from your county or state and print it out just to see how it all works.
The basic idea of that plan is a poured slab foundation — your concrete floor also serves as the attachment point for the walls. You fill in the details of the foundation, the lumber for the walls and roof (trusses or rafters), and your door and window openings.
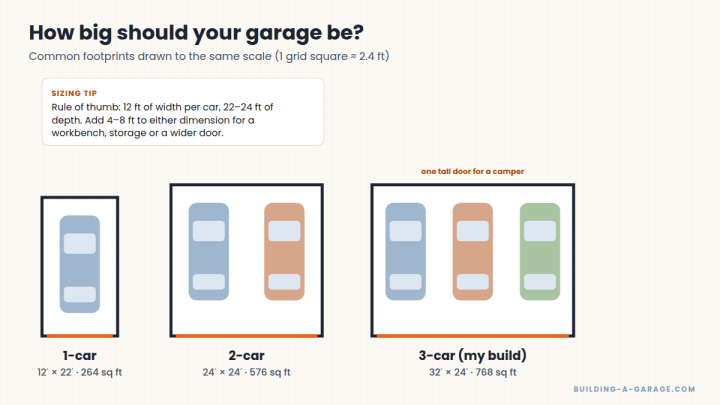
After studying the plans for a long while, I called the community development office again and asked how large a garage I could build with them. The maximum was a 24×24 two-car garage. That was fine except I wanted a three-car garage with an oversize door for a large pickup or camper. I thought for a long time about sacrificing what I wanted to avoid paying for engineering, but in the end I decided to build what I wanted the first time. So I got a list of engineers familiar with the construction guidelines in our county.
Working with an engineer
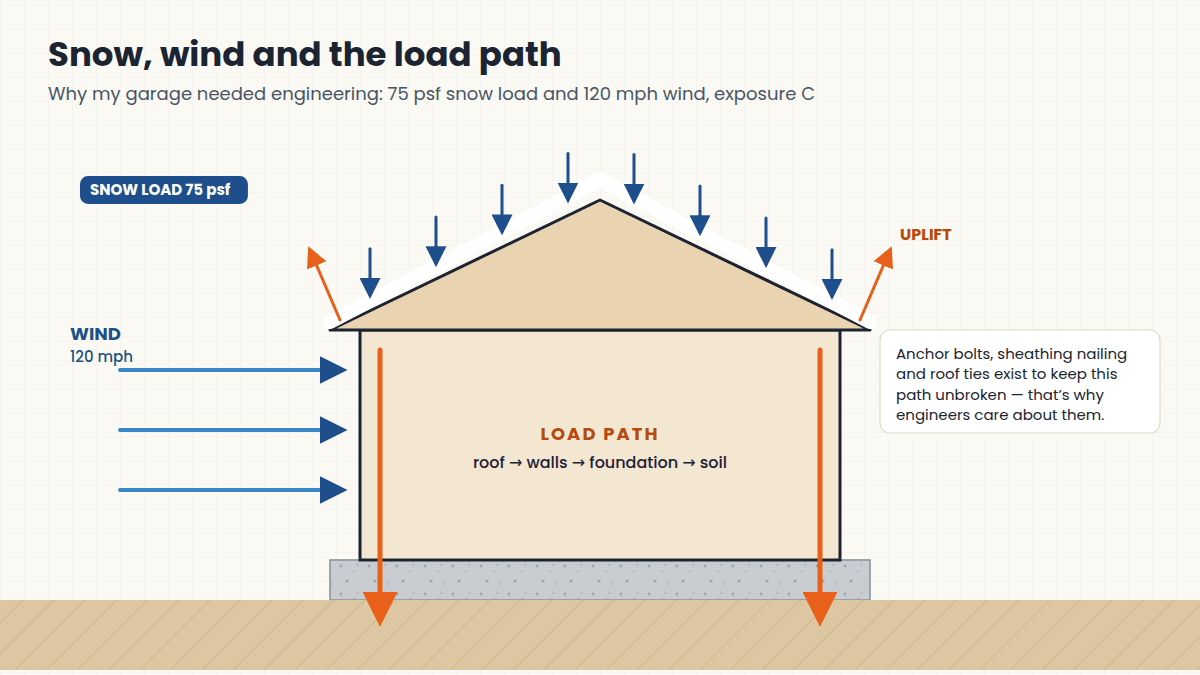
One conversation with a local engineer who lived in the mountains confirmed that post-and-beam construction wasn’t a sensible choice. The lumber needed to properly engineer it for my weather just didn’t make sense, and the whole structure depended on a few members being perfect. It wasn’t something I could build myself.
I was insistent that I be able to do every part of the project myself if I had to, and the engineer said he could come up with a plan so clear that anyone could follow it.
Site survey
We scoped out an exact location for the garage based on the lay of my yard and our foundation ideas, and made sure I had plenty of setback. A detailed site survey is required when a garage is close to a property boundary. By keeping the garage more than 40 feet from any estimated boundary, I avoided the survey and saved about $2,000.
Foundation
Frame construction needs much more of a foundation than post-and-beam. The engineer recommended a solid concrete slab floor and foundation. I asked about the cost — it seemed insanely expensive to haul that many yards of concrete up to my house — and he agreed.
What I did have was a full-size heavy-duty pickup that could carry pallets of concrete block up from town. So we decided the foundation would be built from 8×8×16 concrete block with rebar, and all of the cores filled with concrete (many areas only require every other core to be filled). The foundation would run around the perimeter, and the floor would be dirt and gravel. That sounded good to me. You can read about how it went in the foundation guides.
Roof
The engineer said I’d want pre-built trusses for the roof. A “truss guy” would come out and spec the trusses when the time came, then deliver them, and I’d figure out how to set them on the walls. Normal trusses are basically triangular.
That posed a problem. I wanted one garage door much taller than the others so I could park a small camper in one stall. With a standard truss’s bottom chord running across the top of the walls, the walls would have to be extremely tall to clear that door.
One solution was scissor trusses, which have a raised center that gives much more clearance underneath — we could then put the tall door in the middle. Unfortunately, scissor trusses cost a lot more, and having them specced, built and delivered to my area would have been very expensive.
The next option was to keep the tall door in the middle but put posts between the garage doors supporting large beams, which in turn support conventional roof rafters. It was something I could build myself and it wouldn’t cost a fortune. Party on! (See Framing the Garage-Door Wall.)
Blueprint time
The engineer said he’d create and stamp the blueprints, and make them as clear and complete as possible since he knew I hadn’t done anything like this before.
I gave him a current site plan of my property showing the house, existing outbuildings (an old shed), the well and the septic system. We went over the construction details so I understood what his plan would look like. About a week later I had the prints in hand.
There were two large copies and two small copies, including the site plan with the garage added. Only one large copy was stamped with the engineer’s seal (similar to a notary stamp). That stamped large copy and one small copy went to the county with my permit application, and I kept one of each.
What a garage blueprint package usually includes
Site plan, foundation plan and section, floor plan, wall sections, roof framing (or truss layout), elevations, a nailing schedule, header and beam sizes, and the design loads (snow, wind, seismic). If something you need isn’t on the prints, ask the engineer — that’s what you’re paying for.
Key Takeaways
- Check for your county’s standard garage plan first; it may be all you need.
- Custom sizes, heavy loads or special doors usually mean hiring an engineer.
- Tell the engineer which parts you’ll build yourself so the design suits your skills.
Leave a Reply